Mortal Shell II Walkthrough — Prologue & Forlorn Village (Chapter 1)

Published 2026-09-175 min read

Full walkthrough for Mortal Shell II's prologue and Forlorn Village: the missable Midsummer achievement, the wreath, the Mether statue, and the Haros Shell scene that hands you your first real loadout.

The prologue of Mortal Shell II is short, gorgeous, and hides one permanently missable achievement. This chapter covers the village road, the ritual the villagers are preparing for, and the scene that turns your nameless wanderer into a Shell-bearing Harbinger.
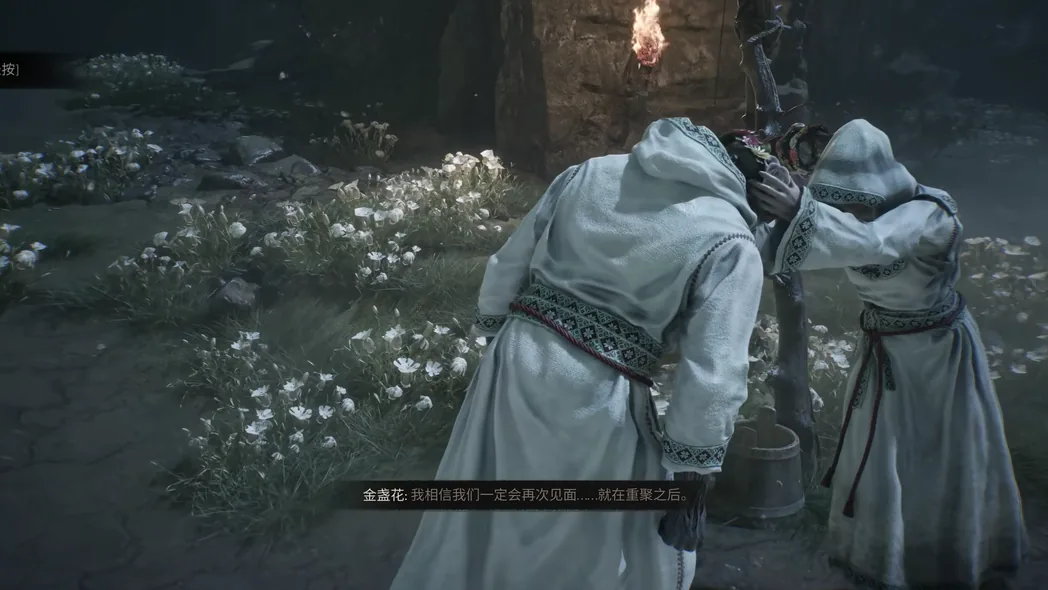
The village road of the Mortal Shell II prologue
A quiet village, a festival being prepared, and one achievement you cannot come back for.

The missable achievement: Midsummer

When the cutscene ends, rise from the fire and turn around. A small path runs behind the fence to the fire's rear-left. Follow it to the cliff edge and collect the Troll Grass — this triggers the pickup tutorial (permanent items rest in your active or passive bars, restore at Beacons, and grow familiar with reuse, unlocking new passive effects).

Keep walking and speak with the NPC, who offers you the wreath. Accept it: that single choice unlocks the Midsummer achievement. The prologue map cannot be revisited in your current cycle — refuse here and the achievement is gone until a future playthrough. The wreath is also a cosmetic you can wear at any Beacon once you reach Marrow Keep.

The road through the village

Continue along the road through the basic combat tutorials. Talk to the villagers and watch the scenery — everyone is preparing for a ritual, and the game never hides what it is. Your character's name, spoken in passing, is one of the prologue's better details.

The Mether statue

At the road's end stands the Mether statue. Interact with the glowing point:

  • You gain the Haros Shell in a story scene.
  • When it ends, your loadout arrives: the Subverter weapon, the Abomination sidearm, and the Immaculate Seal.

From here the game proper begins — and the Disciple's Grotto walkthrough picks up exactly where this scene stops.

Keep reading:

Related Guides


Mortal Shell II Walkthrough — Withered Shoals (Gates, Portals & the Hexapod)Mortal Shell II Walkthrough — Widow's Overlook (Chapter 3: Bosses, Dungeon & Tiel)Mortal Shell II Walkthrough — Valley of the Revered (Winter Lake to the Conqueror)Mortal Shell II Walkthrough — The Ending (Final Area, Branches & the Invader)Mortal Shell II Walkthrough — Sester's Refuge (The Monastery & the Censer)Mortal Shell II Walkthrough — Sanguine Caverns (Bosses, Beacons & Every Tarstone)Mortal Shell II Walkthrough — The Sackhead Secret EndingMortal Shell II Walkthrough — Ruins of Nochte (Smert Ritual, Witch Pit & Silent Gate)Mortal Shell II Walkthrough — Prisoner's Domain (Four Bosses to the Bottom)Mortal Shell II Walkthrough — Outskirts of Mammon (Witch Pit, Smuggler's Den & the Outpost Road)Mortal Shell II Walkthrough — One-Legged Wolf Tavern (Gragu, the Lute & the Toad Quest)Mortal Shell II Walkthrough — Mushroom Village (Chapter 4: Doors, Keys & the Axe and Dagger)Mortal Shell II Walkthrough — Marrow Keep (The Hub: NPCs, Upgrades & Fast Travel)Mortal Shell II Walkthrough — Glutted Mire (Fallen Village, Magdalena & the Etching Needle)Mortal Shell II Walkthrough — Gloomshade Grove (Trials, Dungeons & the Sackhead Gate)Mortal Shell II Walkthrough — Faded Citadel (Sariel, the Forgotten Tower & the Axe Blade)Mortal Shell II Walkthrough — Disciple's Grotto (Chapter 2)Mortal Shell II Walkthrough — Citadel of Penance (The Warden, Eredrim & the Martyr's Blade)Mortal Shell II Walkthrough — Castigator's Keep (Blackwell, the Hungry Hag & the Wraith Halls)Mortal Shell II Walkthrough — Blackridge Cliffs (Flooded Village, the Shattered Beacon & Proxima)Mortal Shell II Walkthrough — Ashen Sanctum (Blue Flames, Sonier & Sir Isaac)Mortal Shell II Walkthrough — Abandoned Outpost (Royal Crypt, Velen & the Obsidian Mines)