Mortal Shell II Walkthrough — Disciple's Grotto (Chapter 2)
Published 2026-09-177 min read
Full Chapter 2 walkthrough for Mortal Shell II: Ruk and the Gloom economy, the Village Outskirts beacon and its Muradean Actuator, the Lich-Ritualist boss, the Fetid Remains fight, and the Ash Golem's Watral Seal.
Chapter 2 leaves the prologue behind and teaches the game's real economy: Gloom for levels, coins for everything else, and Beacons for staying alive. The Disciple's Grotto is where all three lessons land.
Ruk, and how money works
Speak with the great crow Ruk, then roam: kill the beasts by the puddle to practice. They drop Gloom — your XP, spendable only once you reach Marrow Keep — and coins, which buy items and upgrade weapons, sidearms and Tarstones. The game is stingier with coins than it looks, so rob every camp twice.
The silver-gloom tree on the left yields Gloom when struck. Up the stairs, the Mether statue holds a permanent Common Private Brew, and the statue grounds demo the ranged-weapon tutorial: strong damage, paid in Resolve.
The Village Outskirts beacon
Clear the camp up the stairs — a Heart Stone hides in its right corner, a readable log sits on the center crates. Break the crates and drop to unlock the Village Outskirts Beacon. Cleanse it, enter, open the sarcophagus ahead, and claim the Muradean Actuator.
Ride the elevator down, clear the road, and press the wall switch. Cleanse the corruption in the opened gate — and before leaving, note the Heart Stone by the fence gate: it only becomes lootable after the cleansing.
Three fights to the chapter's end
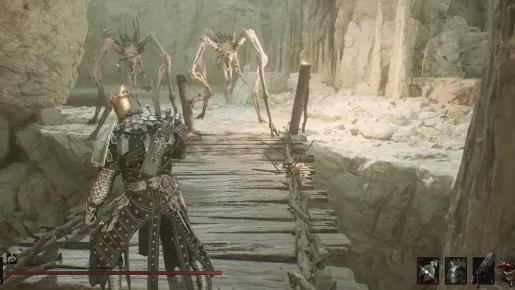
Follow the mountain road and drop at the cliff to the Lich-Ritualist boss. He summons suicide-adds; dodge them, punish him. Through the left cave, clear the camp (log on the crates), and take the left passage — the glowing growth yields a Red Stone. Clear the bridge, enter the cave ahead, and drop in: the Disciple's Grotto Beacon unlocks.
Cleanse it, ride its elevator down, break the left crates, and slip through the gap. Kill the elite, cleanse the corruption, and surface. Left of the Beacon lies Garrick's Den: clear it, read the note, return.
Enter the cave before the Beacon for the Fetid Remains boss — his Scorched Doll drops on death. Sweep, then take the right mountain road down; an elite ambushes the landing, and the rear area holds a Heart Stone.
The Ash Golem and the Ova
Climb to the upper area, speak with Ruk, and push on to the Ash Golem boss. His death yields Watral's Seal. Sweep the left room (and its note) and the wall-note along the right road, then speak with Ruk one last time. Cleanse the corruption, take the Ova — chapter complete, and Marrow Keep awaits.
Keep reading: