Mortal Shell II Walkthrough — Abandoned Outpost (Royal Crypt, Velen & the Obsidian Mines)
Published 2026-09-178 min read
Full Abandoned Outpost walkthrough for Mortal Shell II: the bell-ringer's house, the Royal Crypt of Mammon and the Velen boss, the Gate of Mammon descent, the Sentry's Grave and the Obsidian Mines that end the district.
The Abandoned Outpost is the Ruins of Mammon's longest chapter: bell puzzles, a royal tomb, three dungeons and two boss fights. It is also where Lazlo, the Justicar and the Obsidian Hammer are won. Order of operations below.
The bell-ringer's house
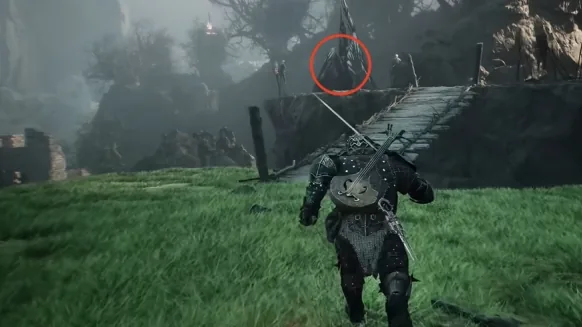
From the Abandoned Outpost Beacon, take the right slope and clear the enemies, then ride the slope up onto the wall. Strike the bell overhead — when the road rises, enter the Ringer's House dungeon and ring its two bells the same way to raise the path. The chest holds the Grudge Stone. Outside, ride the slope down and cross with the device.
Up the mountain, into the crypt
Climb the mountain road to the platform, take the stairs, and open the chest for Nochte's Fang — mind the trebuchet-armed enemies pelting the route. Cross the bridge, clear the foes, and pass under the arch (its left crates hold Common Smuggled Wine). The stairs up and the passage left lead to a lever that opens the great door — and Ruk waits on the statue with Mammon Map Fragment 6; the flanking statues hold Martyrs' Ashes.
The adjacent High Lord's Court Beacon unlocks. Return to the passage and ride the left device up, entering the room on the right: the Royal Crypt of Mammon. Straight through to the boss arena — the side alcoves hold loot — and face Velen, High Lord of Mammon.
Velen and the crypt's rewards
Beat Velen and three walls of the chamber collapse. The flanking vaults' sarcophagi hide four Mammon Coins total, and the final chamber holds the Lazlo Shell and its memory scene. Leaving the crypt, the right road's room holds a Revered Gland, and a Backplate Stone rests on the stone chair by the exit.
The Gate of Mammon and two dungeons
Out the gate, down the steps, ride the lever-elevator and cross with the device to unlock the Gate of Mammon Beacon. Its chest holds 2,000 coins; the elevator behind it descends into the district's lower warren. The glowing growth behind the house yields a Red Stone; the plank cart conceals a tunnel to the lower platform and the Infested Miner boss — the Residue Bearer's Stone is his price.
Continue through the passage, cross the right road's bridge, and take Mammon Map Fragment 4 where Ruk waits. Climb the stairs to the top, exit left, break the wall boards, and clear the room — its balcony chest holds the Splitting Stone.
The other exit leads to the Sentry's Grave dungeon: descend, break the left boards, cross the room, drop from the passage, and face the Enslaved Guardian — clear his adds first for an easier fight. Victory yields the Ballistazooka sidearm.
The Obsidian Mines finale
Out the left door, climb to the bandit camp (stock up), and loot the Backplate Stone from the left stone chair. Enter the cave, smash the right barrels for Common Private Brew, and break the left boards for the Unassuming Key and a Red Stone. Ride the elevator to the bottom, sprint past the mobs, and return to the Ruk area — the cliff road below the statue leads down.
Cross the bridge into the lower room (skip its dungeon for now), exit right, and ride the lever-elevator on the far side down to the Obsidian Mines: loot the Heart Stones from the side crates, drop through the central plank, and follow the rocks down into the boss arena. The Prophet, Profaner of the Infinite falls for the Obsidian Hammer and the Paradox Scripture. Ride the light out, break the boards up the wooden road, and climb back to the Gate of Mammon Beacon. Chapter complete.
Keep reading: