Mortal Shell II — Gloomshade Grove Beacons: Route to the Gate Below
Published 2026-09-174 min read
The Gloomshade Grove Beacon and the gate beacon beyond it form the western chain of Fainweald in Mortal Shell II. Route from Blackridge Pass, the drop through the derelict hideout, and the Mether's Breath prerequisite you must clear first.
Gloomshade Grove anchors the western side of Fainweald — a tangle of forest roads, jumping pads and dungeons that eventually spills into the region's second beacon chain. This route cleanses the grove's own Beacon and the gate Beacon at its far end.
The prerequisite
Reaching parts of this route requires Mether's Breath, the ability that clears corruption walls — earned by defeating a main gate boss and delivering its Ova. If a wall of corruption blocks your path, go win a gate first (the Magdalena fight in the Glutted Mire is a popular first target) and return.
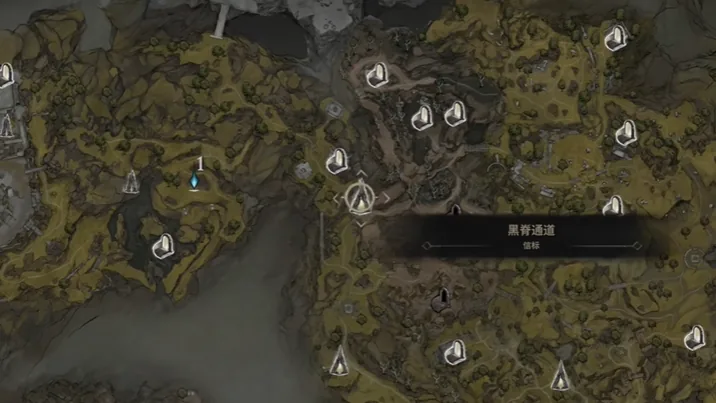
The route: Blackridge Pass → Gloomshade Grove → the gate below
- Start at the Blackridge Pass Beacon and head for the derelict hideout — drop in through the well opening to reach its lower level.
- Ride the jump pad across, which flings you toward the area near the Citadel of Penance.
- Keep running forward and cleanse the Gloomshade Grove Beacon.
- From the grove, follow the road onward until you reach the gate beacon that opens the lower route toward the Sanguine Caverns side of the region.
- Cleanse that Beacon too — it is your respawn anchor for everything the caverns district throws at you.
Why bother with both
The grove Beacon alone covers the forest's surface fights and the Martyr's Prison approach; the gate Beacon covers the descent layer. Between the two, the entire western half of Fainweald becomes a fast-travel web instead of a death march.
Keep reading: